

Arduino Yún is the one of the best prototyping boards used for building Internet of Things applications. Unlike others, Yún is smaller in size and also enabled with inbuilt WIFI connectivity and Linux running machine. Yún consists of two IC's Atheros AR9331 runs OpenWRT-Yún Linux build with OpenWRT Wireless Stack and a 8-Bit Atmega-32u4 used to hook up the sensors, Actuators,etc., for collecting the sensor DATA. So with this we can collect the data and push to the cloud API. Both the IC's are connected with a BRIDGE using serial port.

OpenWRT-Yún Linux mainly built for embedded platform comes with inbuilt Python 2.7.4 installed and you can also install ruby, node or PHP as you prefer.
Once configured with the wifi network, the Atmega 32u4 can be programmed via wifi as well as usb port.
PREREQUISITES
- Format the SD Card to work with Arduino Yún storage.
- Install the Latest Version of the Arduino IDE (1.5.6 or later) to download the software click this Arduino IDE LINK - Present Version is Arduino IDE 1.6.6.
- Finally connect Arduino YUN to your computer and upload the blink Program to verify the hardware drivers are working as expected.
HARDWARE
- Arduino Yún
- USB Cable

Atmega 32u4 - Hardware Chip to program and interface various sensors, actuators, etc., which has PWM, Analog and Digital GPIO's.
Atheros AR9331 - This is the Linux and WIFI Chip runs LINUX OpenWRT.
Ports - a standard USB Port, Micro-USB Port and Ethernet Port
Push Buttons - a Atmega 32u4 RESET Button, a Yún Reset Button and WIFI/ Linux Factory Reset Button
SD Card Port - A Micro SD Card Holder for the external data storage.
Setting up the SD Card
Format the SD Card using the SD Card Formatter Tool, This tool can be downloaded from SD Formatter LINK with FAT File System.
Once the SD Card is Ready,
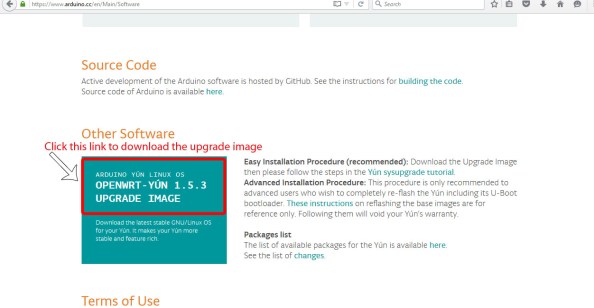
for upgrading the Arduino Yún download the OpenWRT 1.5.3 Upgrade bin file from OpenWRT Upgrade LINK unzip the file and copy .bin file to the SD Card and mount the SD Card to Arduino-Yún.

for upgrading the Arduino Yún download the OpenWRT 1.5.3 Upgrade bin file from OpenWRT Upgrade LINK unzip the file and copy .bin file to the SD Card and mount the SD Card to Arduino-Yún.
Setting Up the WiFi Connection
If you hold the WiFi button for more than 5 seconds but less than 30, it will reset the WiFi networking settings.
For Yún will reset to factory conditions hold down the Arduino’s WiFi reset button for more than 30 seconds, your Yún will reset to factory conditions! (Though, if you’ve upgraded OpenWRT, the new version will remain.)
CONFIGURING YUN TO WORK WITH LOCAL WIFI NETWORK AND DEVICE UPGRADING TO LATEST FIRMWARE
- When you first power on the device it will create a wifi network called ARDUINO-YUNXXXXXXXX, Now check for WIFI-SSID ARDUINO-YUNXXXXXXXX and connect to the device WIFI HOTSPOT, its a open network for an example see below,

- Once your are connected to the network, open the browser and visit arduino/local or 192.168.240.1 with the default password arduino.

- If your are not updated at least once, just scroll down to end of the page you will see an option for update the OpenWRT, just click on RESET.

- Wait for device to get updated, have patience since it takes some time for upgrading. Once it gets updated - There will be more fun to play around the device.
- Once the device is upgraded lets configure settings, visit arduino/local or 192.168.240.1 make sure that you are connected to the ARDUINO-YUNXXXXXXXX wifi network.
- Click on Configure Button, Give your desired username, password, timezone and wifi credentials.


- Click CONFIGURE & RESTART, when you are waiting for the device to get restarted switch your laptop wifi to your local wifi network.
- Now Arduino-Yún is connected to your wifi network, you got to know the IP address of the device by scanning all the devices using wifi by an Android App - Network IP Scanner or installing a software on Linux, MacOSx or Windows download using this Angry IP Scanner LINK.
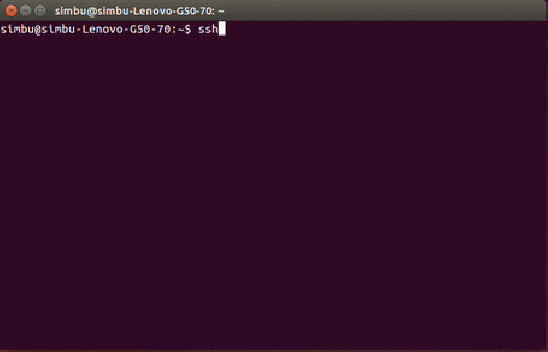
SETTING UP THE SSH CONNECTION
- Start the SSH Connection by using the PuTTY Termial, if you are using windows or Terminal on Linux Running Machine.
- Type ssh root@[your username].local or you can also login ssh session with your ip address by using ssh root@192.168.XX.XX.
PROGRAMMING ATMEGA 32U4 OVER WIFI NETWORK
Arduino-Yún also has a functionality of uploading the firmware to Atmega 32u4 using the network port by just following these steps.- After configuring your Yún, connect to the network you specified in the configuration settings. Open the Arduino IDE.
- Under the Tools > Port menu, you should see an entry that lists your Yún's name and its IP address. Under the Board menu, select Arduino Yún.
- Open the Blink example (File > Examples > 01Basics > Blink) and upload the sketch to the board. You will be prompted for the administrator password. Use the one you entered in the configuration screen.
- Once the program is uploaded, the 32U4 processor will restart. You should see the LED connected to pin 13 blinking.
Finally, you've successfully upgraded Yún to the latest version, made a external storage, then connected to a wifi network, uploading scripts through network thumb's up!! we have completed setting up the device and now you are ready to play around different IOT Projects.
··• )o( •··
Harika bir yazı olmuş, emeğinize sağlık.
ReplyDelete