
Face Recognition using RPi and IBM Watson


IBM Watson has come with an intelligent Visual Recognition API which can identify the objects on the image, human face according to the training sets has been provided which helps us to build our own custom classes without even worrying about the algorithm.

Visual Recognition API API provides developers to develop their own application with preferred programming language. Watson Visual Recognition provides API support for JAVA, Node.js, Python and also REST API access.

I will walk you through the Watson Visual Recognition API,
  • How to train the API and create custom classifier?

  • How to identify the human faces using the Visual Recognition API?
I have developed an python script for capturing the images of a person using Raspberry Pi and picamera and send the images to the Watson API to process the image to recognize the face and provide the scores with matching class.

Get started with clicking any 2 image sets of faces with at least 10 images of each faces, and zip those images with respective names.

Hardware Required

  • Raspberry Pi 3

  • Picamera

Web Component Setup

Walk through to setup and get key for IBM Watson Visual Recognition API,
  1. Register for IBM Bluemix with US South or your preferred region.
  2. Login to the IBM Bluemix.
  3. Select Create app, to start with the new applet
  4. Find Watson on Services tab
  5. On Watson services, select Visual Recognition API
  6. Click on create to get started.
  7. On Service credentials, select on credential-1 and copy the api-key

Install Watson Visual Recognition Python SDK

Official SDK Repo: Github

To install, use pip or easy_install:

$ pip install --upgrade watson-developer-cloud

or

$ easy_install --upgrade watson-developer-cloud

Train a Custom Classifier

  1. Clone the source code using,
    git clone https://github.com/suryasundarraj/watson-visual-recognition-raspberry-pi-camera.git

  2. Get into the folder
    cd watson-visual-recognition-raspberry-pi-camera

  3. Move the zip files made earlier to the current folder

  4. Update the file names on the code,
    face_zip_1 = ""
    
    face_zip_2 = ""

  5. Update the api-key from the IBM Watson Visual Recognition Service Credentials on train.py and face.py

  6. Run the Script,
    python train.py

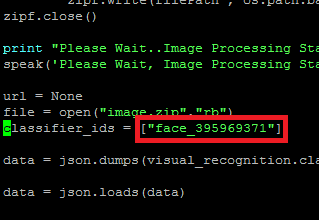
  7. Wait for the classifier id to get generated

  8. Replace the classifier id to the face.py,
  9.                                

Install Picamera

  1. From the prompt, run "sudo raspi-config". If the "camera" option is not listed, you will need to run a few commands to update your Raspberry Pi. Run "sudo apt-get update" and "sudo apt-get upgrade"

  2. Run "sudo raspi-config" again - you should now see the "camera" option.

  3. Navigate to the "camera" option, and enable it. Select “Finish” and reboot your Raspberry Pi.

Run Face Recognition

  1. Make sure you update the api-key on face.py and train.py

  2. Connect the picamera to the rpi
                                 
  3. Change the name on the face.py with your name,

  4. Run the script, and rpi camera starts capturing your image and uploads to the watson api.
    python face.py

  5. Watson api, returns json data with the score for the matches.

  6. Based on the high score, the program decides the face on the classifier.

 If there is no matches api responds,

IBM Visual Recognition service allows only one custom classifier instance for free account, if you decide to play more with the api. Check out the pricing plans on the service page.

With this, You will be able to use the visual recognition api with human face recognition. Feel free to comment below if you are looking for some help and also please share your experiences or any particular challenges that you might have faced in executing this setup. I will be back soon with some more interesting demos.

Comments

  1. Thank you for posting such a great blog. I found your website perfect for my needs. Read About Facial Recognition Software

    ReplyDelete

Post a Comment

Popular posts from this blog

Upgrading Firmware to HM-10 CC2541 BLE 4.0

HM-10 BLE 4.0 Module CC2541 MCU can be set up,also can controlled by a remote Bluetooth device for setting,can transfer data, and can remotely control 10 PIO pins,so,the best choice is HM-10 bluetooth module. It can replace HC-05, HC-06, HC-07 etc. Support Central and  Peripheral mode switch, modify by AT commander . The Bluetooth UART RS232 serial Converter Module can easily transfer the UART data through the wireless Bluetooth, without complex PCB layout or deep knowledge in the Bluetooth software stack, you can combine this bluetooth module with your system: Any Micro controllers, ARM or DSP systems can be interfaced with HM-10. SOC systems. Personal Digital Assistants (PDAs) Computer Accessories Other systems your want to use under bluetooth functions. DEVICE FEATURES Fully Qualified Bluetooth V4.0 BLE module Full Speed Bluetooth Operation with Full Piconet Support and Scatternet Support Increadible samll size with 3.3V input, and RoHS Compliant

Expanding Filesystem Size for BeagleBone and RPi

Beagleboard / Raspberry Pi : Expanding File System Partition On A microSD  This is a tutorial on how to expand the space used by the file system on an external micro SD card on your BeagleBone Black and Raspberry Pi. This tutorial will work with any of the Linux operating systems mentioned on  Ubuntu On BeagleBoard Black  or  Debian On BeagleBoard Black  that boot from a micro SD card With lots of trial and errors for expanding the file system size of a SD-Card using command line which crashed the file system. I found the alternative way of doing it. Requirements Ubuntu Operating System with Gparted Installed SD Card with Debian 8 for Beagle Bone Black Expanding File System Size using Gparted Insert the SD Card into the Ubuntu Running System Open Terminal and Install Gparted sudo apt-get install gparted On Terminal to open gparted, type gparted command Select the SD Card Right Click on the mount sd card, and click on Resize Resize by dragging to the end.

Low Power Wide Area Networks for IoT Products

M2M and IoT or Internet of Things will give rise to billions of nodes that require connecting. Most of these will require only low bandwidth to transfer small amounts of data. Some will also require this to be connected over distances greater than those achievable simply by a transmitter on its own. For many of these applications, the traditional cellular phone systems are too complex to allow for very low power operation, and too costly to be feasible for many small low cost nodes. Focusing on measure of success in communication, the latest present scenario “IoT Network” plays a vital role in the development of  communication between the various modes. in which ,the major controlling of all the operations in any remote smart devices depends upon the network modules. The modules for the communication is preferred based upon the convenient of the smart devices developed. Mainly depends upon the range, Power Consumption Efficiency Losses Dimension-ally distance So,